Cadence的Spectre工具的最新版Spectre191提供了新的功能:Spectre X。根据官方的宣传是利用了比较新的数学计算方法来加速仿真,在不牺牲精度、不删减节点的情况下即可以获得明显的加速。同时还有xdp功能来高度并行化仿真,以实现post-layout仿真。
比较奇怪的是,在最新的Virtuoso里面仍然没有集成相关的配置选项。不过还好在Spectre X的帮助手册中找到了相关的介绍,先贴一下:
Using the Spectre X +preset Option
Spectre X provides five high-level +preset options (cx, ax, mx, lx, vx) that allow you to trade off accuracy and performance. These high-level options not only control solver settings, but also enable parasitic
optimization after automatically detecting postlayout designs. The cx mode provides the highest accuracy, while the vx mode provides the highest performance. To start a Spectre X simulation, type the following at the command line:
% spectre +preset=mx input.scsThe following provides guidance on the +preset selection options:
| Option | When to Use… |
| cx | when a golden simulation reference is needed |
| ax | for high-precision analog applications |
| mx | for most analog applications (default) |
| lx | for power management and other relaxed analog applications |
| vx | for custom IC verification |
Spectre X +preset uses the same multi-core simulation approach and use model as Spectre APS. By default, 8 cores are used.
% spectre +preset=mx input.scs +mt=4While postlayout optimization enabled by the +preset settings is sufficient in most cases, there may be designs that require you to adjust, or disable posdayout optimization. You can do this by using the
+postlpreset command-line option, which accepts the following values: off, cx, ax, mx, lx, and vx. The +postlpreset command-line option can also be used to enforce postlayout optimization in case
Spectre X does not detect the postlayout nature of a design.
% spectre +preset=mx +postlpreset=cx input.scsBy default, Spectre X ignores the user-specified simulation options that trade-off performance and accuracy. However, you can use the -preset_override command-line option to tell Spectre X to honor the user-specified simulation options, as shown below.
从上面我们可以看出,启用Spectre X只需要添加一些命令行参数即可,同时又一些精度选项好后仿真的选项。因此,我们可以在ADE的Setup – Environments – User Command-Line Options里面命令即可实现。
如果你的电路的精度要求比较高,尤其是对时间敏感(例如眼图宽度、采样时间、开关电容等),平常使用APS Moderate甚至Conservative的仿真精度,同时不打开APS++才能满足你的话,经过我的测试,下面的操作才能实现同样的精度,不然仿真的结果还是会偏差的:

- 将reltol从默认的1e-4调到1e-5
- +preset=cx +postlpreset=off -preset_override
第一个参数就不说了,第二个参数是关闭后仿真优化,如果你是后仿真的话,可以添加这个参数,因为我是前仿真添加了pre_simu,并不希望仿真器优化网表,因此关闭,第三个则是让仿真器尊重reltol的设置。
经过实际测试,采用上述的最高精度的配置,Spectre X的仿真结果可以媲美传统的APS的精度。同时,仿真速度的确大幅增加,简单评估了一下,至少有2倍以上的速度提升,非常可观。如果你的精度本身要求不高,采用普通的精度设置,提升就更加明显了。
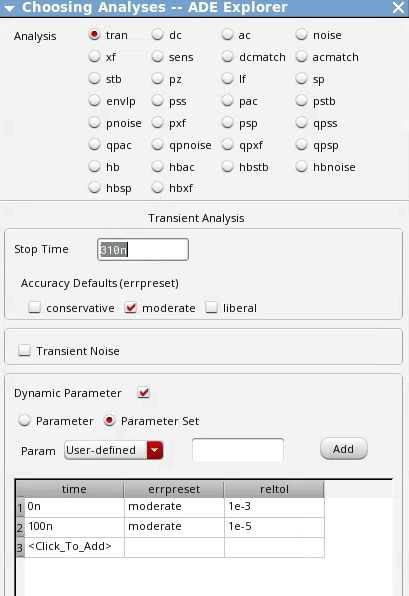
多说一句,reltol的设置也可以放到Dynamic Parameter里面:芯片上电开始的时候,比如运行一些校正,等待DC启动,可以1e-3的精度,等芯片正式开始工作了再自动切换到1e-5。
